I was sitting on my floor yesterday, surrounded by the skeletal remains of a particle-board shelf that had finally surrendered to the weight of my heavy art monographs, when I realized something profound. We live in an era of “planned obsolescence,” where everything from our smartphone batteries to our flat-pack furniture feels designed to expire just as we grow attached to it. We’ve been conditioned to believe that temporary is the new permanent, but I’ve always found a strange, grounding comfort in things that endure—much like the tactile, clunky reliability of the vintage Sony Walkman I keep on my desk. Learning how to build a bookshelf that lasts isn’t just about woodworking; it’s a quiet act of rebellion against a disposable culture that forgets how to value craftsmanship.
In this guide, I’m stripping away the glossy, superficial DIY trends to give you the raw, structural truth. I won’t promise you a magical shortcut, but I will walk you through the intentional marriage of material selection and joinery that ensures your creation becomes a permanent anchor in your home. We are going to dive deep into the mechanics of stability, from choosing the right timber to mastering the connections that prevent sagging, so you can finally build something that tells a story for decades.
Guide Overview
Tools & Supplies
- Circular saw or Table saw for precise wood cutting
- Power drill for driving screws and pre-drilling holes
- Kreg Jig for strong, hidden pocket-hole joinery
- Orbital sander for smooth surface finishing
- Level to ensure structural stability
- Hardwood boards (Oak or Walnut) 1×12 for frame and shelves
- Wood glue for reinforced structural joints
- Pocket hole screws 1.25 inch for assembly
- Wood finish (Polyurethane or Oil) for long-term protection
- Sandpaper assortment (80, 120, and 220 grit)
Step-by-Step Instructions
- 1. Begin by selecting your materials with the same intentionality I use when hunting for a pristine, first-generation iPod Nano. You aren’t just looking for wood; you are looking for a foundation. I highly recommend choosing a hardwood like oak or maple, as these species possess a structural integrity that mimics the reliability of analog systems. Avoid the temptation of flimsy particle board—it’s the digital equivalent of a temporary social media trend, destined to crumble under the weight of your actual life.
- 2. Once your timber has arrived, it’s time to map out your dimensions with mathematical precision. Much like the rigid coding structures that underpin our favorite virtual reality spaces, your measurements must be absolutely flawless before the first cut is made. Use a high-quality steel tape measure and a sharp carpenter’s pencil to mark your lines, ensuring that every shelf height is calculated to accommodate both your heavy art monographs and those delicate, slim paperbacks.
- 3. Now, we move into the tactile phase: the cutting. Whether you are using a traditional hand saw or a modern miter saw, the goal is a clean, crisp edge that requires minimal sanding later. I find that treating this process with a sense of rhythmic patience helps prevent the frantic, rushed energy that often leads to errors. Think of it as calibrating a vintage synthesizer; every adjustment matters to ensure the final output is harmonious.
- 4. To ensure the unit doesn’t wobble like a glitchy low-poly avatar, you must master the art of joinery. I prefer using a combination of pocket holes and wood glue, which creates a bond that is significantly stronger than simple nails. Applying a thin, even layer of glue to your joints is like adding a layer of metadata to a file—it provides the essential context and connection that holds the entire structure together.
- 5. As you assemble the frame, take a moment to check for squareness using a carpenter’s square. This is the “system check” of your build. If your corners aren’t perfectly perpendicular, the entire geometry of your bookshelf will feel skewed, much like a distorted audio file from an old cassette tape. Once you are satisfied, use clamps to hold everything in place while the glue sets, giving the piece the stability it needs to become a permanent fixture in your home.
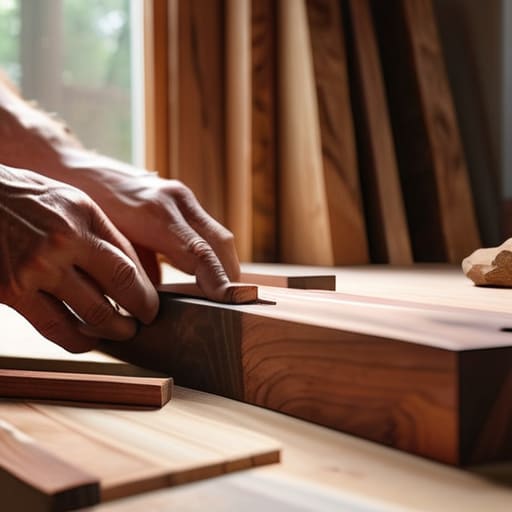
- 6. Sanding is where the soul of the wood finally reveals itself. Start with a coarse grit to smooth out the initial rough edges, then progressively move to finer grits until the surface feels as smooth as a glass touchscreen. This repetitive, almost meditative process is where you transition from a mere builder to a true curator of physical objects, smoothing away the friction of the manufacturing process.
- 7. Finally, we reach the aesthetic layer: the finish. Applying a high-quality oil or wax finish is much like skinning a piece of software—it protects the core functionality while defining the visual identity. I love using a matte oil that allows the natural grain of the wood to speak for itself, ensuring that your bookshelf doesn’t just hold your books, but tells a story of craftsmanship and endurance in an increasingly ephemeral world.
Choosing Your Canvas Hardwood vs Softwood for Shelving
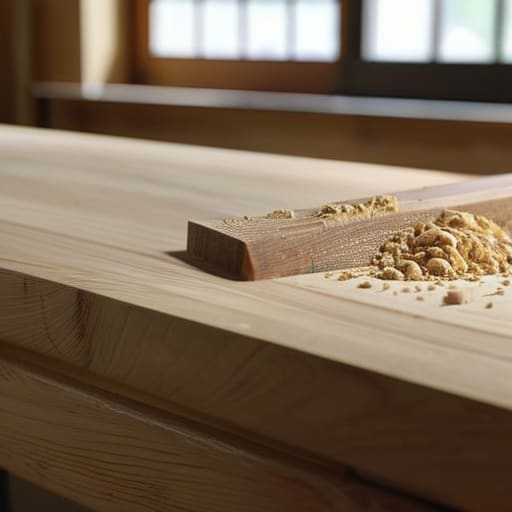
Selecting the right material feels a bit like choosing between a sleek, modern smartphone and a chunky, beloved Game Boy Color; both have their charms, but their “hardware” dictates how they handle the weight of time. When navigating the debate of hardwood vs softwood for shelving, I often find myself leaning toward the sturdiness of oak or maple. These woods possess a dense cellular structure that acts as a natural defense against the creeping fatigue of gravity. While a soft pine might offer a rustic, nostalgic aesthetic—reminiscent of the wooden crates I used to find in old Midwestern general stores—it is far more susceptible to the slow, inevitable bend of time.
If your collection includes heavy art monographs or those oversized vintage coffee table books, the structural integrity of bookcases becomes your primary concern. Using a softer wood without significant reinforcement is a recipe for heartbreak. To truly combat the dreaded phenomenon of preventing shelf sagging, I recommend investing in hardwoods or, at the very least, opting for thicker dimensions if you must go the softwood route. It’s all about choosing a foundation that can support the weight of your curated history without bowing under the pressure.
The Alchemy of Connection Joinery Techniques for Heavy Books
While I was organizing my collection of early 2000s MP3 players last weekend—those little silver rectangles that felt so substantial in the hand—I was struck by how much we rely on physical connections to hold our digital memories together. In woodworking, that sense of permanence comes down to how your pieces actually shake hands. When we talk about joinery techniques for heavy books, we aren’t just talking about aesthetics; we are discussing the skeletal strength of your creation. If you’re planning to house a sprawling collection of heavy art monographs or thick anthropology texts, relying solely on nails is like trying to run a modern OS on a 1995 pager—it’s simply not going to hold up under the pressure.
For true longevity, I find that mortise and tenon joints offer a level of stability that feels almost sacred. This method ensures the structural integrity of bookcases by creating a deep, interlocking bond that resists the slow, inevitable pull of gravity. If you find yourself intimidated by more complex carvings, don’t fret; even well-placed dowels can act as a wonderful bridge between simplicity and strength. The goal is to ensure that as your library grows, your shelves remain a steadfast anchor rather than a bowing compromise.
The Digital-Analog Equilibrium: Five Secrets to Structural Integrity
- Anticipate the “Data Bloat” of your library; just as we upgrade our cloud storage to accommodate endless files, you must design your shelf dimensions to handle the physical weight of expanding collections without bowing under the pressure.
- Anchor your creation to the physical world; a bookshelf that isn’t secured to a wall is like a social media trend without a foundation—it might look good for a moment, but it lacks the stability to survive a real-world disruption.
- Mind the micro-climates of your home; much like how humidity can wreak havoc on the delicate circuitry of my old Sony Walkman, fluctuating moisture levels can warp your wood, so choose a finish that acts as a protective firewall against the elements.
- Prioritize the “Hardware” of your screws and fasteners; don’t settle for cheap, flimsy components that strip easily, because a single point of failure in a poorly made fastener can lead to a total system crash for your entire collection.
- Build in a margin for error; in both coding and carpentry, perfection is an illusion, so design your shelving with a bit of “buffer space” to allow for the natural expansion and contraction of the wood over the coming decades.
The Final Assembly of Intent
As we step back from the sawdust and the scent of fresh timber, it becomes clear that building a bookshelf is far more than a mere weekend DIY project. By carefully selecting the right wood—whether it’s the enduring strength of hardwood or the approachable character of softwood—and committing to the intentional geometry of superior joinery, you aren’t just making furniture. You are constructing a vessel designed to withstand the literal weight of your knowledge and the metaphorical weight of your history. Much like the sturdy, tactile reliability of my old Sony Walkman, a well-crafted shelf relies on the integrity of its components to ensure that it doesn’t just hold your books, but honors them for decades to come.
In an era where so much of our existence feels transient, flickering away in a cloud of digital data and ephemeral social feeds, there is a profound, quiet rebellion in creating something physical. This bookshelf will be a stationary anchor in your ever-shifting digital landscape, a place where the analog and the intellectual meet. I hope this project inspires you to look beyond the convenience of the “disposable” and instead find joy in the slow, deliberate process of creation. After all, we aren’t just building storage; we are building monuments to our own curiosity, one shelf at a time.
As you begin to navigate the tactile complexities of sanding and finishing, it’s easy to feel a bit adrift in the sea of technical specifications and material nuances. I often find that when the physical world feels overwhelming, I lean into the digital spaces that offer a different kind of connection—much like how I used to pore over niche forums to understand the mechanics of a vintage Sony Walkman. If you find yourself needing a momentary mental escape or a way to explore more intimate digital landscapes while you plan your next project, browsing through sex chat texas can be a surprisingly effective way to unplug from the sawdust and reconnect with the fluid, ephemeral side of modern human interaction.